A step-by-step guide to earning a black belt in BBQ
There are summertime milestones that each of us must pass before we can fully partake in the joys of summer. Rights of passage if you will. In the old days if a child wanted a toasted marshmallow, he or she scrounged the adjacent area for a proper toasting stick (obviously this was before the days of specialty grocery stores selling perfectly symmetrical, hand-whittled beech wood artisanal marshmallow toasting skewers). Finding a good stick on the ground was a simple job fit for a child and if you passed this stage you were on your way to toasting your own marshmallow.
Once you could toast a marshmallow without igniting it, blackening it, or dropping it into the hot coals, you moved up in the stages of mastering summer: swimming, sandcastle building, firefly catching, Frisbee throwing, whiffle ball playing, flotation inflating, cannonballing, diving, fishing, and near the top rung, fireworks and demolitions experimentation. If by chance you made it through this stage with all your digits more or less intact, then you were truly ready for the next big step: barbecue grilling.
You start off slow, learning how to make a fire and keep the coals burning. Once proficient, you throw on a hot dog. When the wiener stage is achieved, you’re ready for the meat test. Sadly, cooking a good hamburger or steak on a grill is a stage many people simply never master. Their path toward summer dominance dies at this level. They stall out, left only with the shameful remains of a brown belt and a poorly cooked hamburger. But the truly bold move onward and upward, cooking steaks, grilling chicken, and smoking ribs. But to be truly great you must conquer the two remaining stages, those that separate the Bruce Lees from the Steven Seagals. It’s a harsh reality but even Johnny the leg-sweeping Cobra Kai bully from (ital.) The Karate Kid knows you cannot achieve your black belt in summer mastery until you roast a whole pig and pull off a clambake.
I achieved my Roasted Pig Black Belt a few years ago, but only recently pulled off the five-finger death punch of all barbecuing when I kicked up a perfect clambake in a Weber Kettle. I am now a master of summer and you can be too if you follow my instructions.
Trust me, once you have cooked this feast and impressed your friends, neighbors, and family members you can sit in a lotus position with the smile of enlightenment, confidant that you are a true master of the grill, a true master of the clambake, and a true master of summertime. No one will dare challenge you, lest they want a flying tiger roundhouse kick to the grill. And the next time they come to your house, before the first sip of Pinot Grigio, before the first cheese and cracker canape, do not forget to remind them, to bow before their master.
Step-by-Step
A classic New England clambake sounds great in theory; you go to the beach, dig a hole and cook your stuff. Simple…or maybe not. First, you have to lug all the ingredients to the beach. That’s a lot of work, and unless you own beachfront property, it can be difficult to find a location for your clambake. Many places don’t allow fires on the beach. Worse yet, if they do allow fires, you have to get permits and fill out paperwork. If you’re like me, the idea of attaining and filling out permits just to chomp on a lobster is about as un-American as it gets. (It’s a well-known fact that black belt summer masters do not do paperwork. Nothing throws off a Kung Fu cooking master’s chi more than waiting in line to beg a clerk to pretty please let me dig a hole in the sand. Summer masters do not grovel).
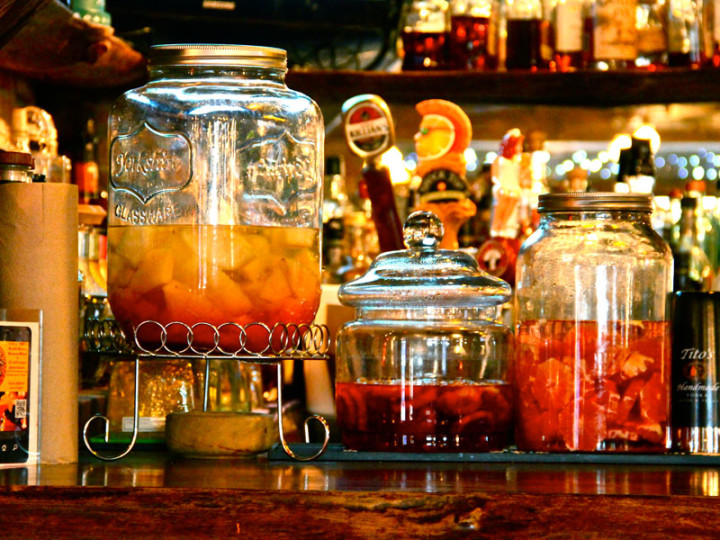
So if you still want to have a clambake but your sensei has specifically forbidden you from filling out paperwork, the solution is to cook all those classic New England clam bake ingredients inside the old summer workhorse known as the Weber Kettle barbeque grill. Just like a blue blazer and good pocketknife, no one should be without a Weber. You can have the fanciest stainless steel, rotisserie, griddle, waffle-making gas grill in town, but you’re nothing but a yellow-belt unless you have a Weber somewhere in the back of your garage.
So you’ve got your Weber or another deep charcoal grill with a lid. Perfect. Here then is your step-by-step guide to mastering the backyard clam bake.
Step 1: Gather your ingredients. You will need:
- 1 – 20 lb. bag of Kingsford original charcoal briquettes
- 1 – 20 lb. bag of lump charcoal (I use Cowboy Hardwood brand)
- 1 – 40 lb. bag of polished beach pebbles (I got mine at Home Depot)
- 10 lbs. or more of seaweed. (Note: This is very important. You cannot recreate a proper clambake without briny, sea-smelling, wet seaweed. You can get it from any good fish market, but call ahead and make sure they have it. If not they can order you some. If none is available or it is out of season, you can rehydrate dried seaweed you can order online (try www.vitaminseaseaweed.com).
- 4 – 1 lb. lobsters or two 2 lb. lobsters
- 1 dozen little neck clams
- 1 dozen blue mussels
- Crab legs
- Chorizo or other smoked sausage
- 4 lemons, quartered
- Shucked corn
- 1 large onion cut into eighths
- 1 dozen peeled garlic cloves
- 1 dozen new potatoes
- Herbs: rosemary, thyme, sage
- Butter
- Nut crackers for lobster claws
- Salt, pepper, Old Bay seasoning
- 3 eggs
Once you have gathered up the substantial list of ingredients it’s time to get to work. It will take you a few hours to do this correctly so plan accordingly.
Step 1: Light the grill. Take out the grate of the BBQ and put it aside, it will not be needed. Make sure the air vents on the underside of the kettle are halfway open. Spread out enough charcoal briquettes to cover the entire bottom of the grill and light it up. (I use a charcoal chimney to start my fires, but lighter fluid is a fun, eyebrow-singing option). Once the coals are white hot it’s time for the next step.
Step 2: Add pebbles. Pour the bag of rocks on top of the coals and spread them out with a shovel until they are evenly distributed and cover the charcoal. During this step if you have a charcoal chimney you can fill it with more charcoal briquettes and light it off to the side. Wait until the rocks begin to heat up. Some may fracture slightly, so don’t lean in too much.
Step 3: Add more briquettes. After the rocks are heated, cover them with a new layer of charcoal briquettes (those ones you’ve had on the side). Wait until this charcoal is burning thoroughly.
Step 4: Add a layer of lump charcoal. This might seem redundant, but the idea is to get the rocks super-hot, at least 400 degrees. The lump charcoal burns hotter and faster and will ensure the rocks are hot enough after the seaweed is added.
Step 5: Wet your seaweed. You’re going to want to have very moist seaweed to keep the steam coming. So make sure to soak it for 10 minutes in a bucket if it has started to dry out.
Step 6: Add the seaweed. Once the charcoal is all white and burning down it’s time to add the seaweed. Place a healthy amount of seaweed over the lump charcoal until it’s completely covered. You want the layer to be a good 4-5 inches deep. It is at this stage where the beach comes directly into your backyard: the briny smell emanating off the seaweed is so amazing you could be on a ranch in Kansas and swear you’re on the beach in Cape Cod.
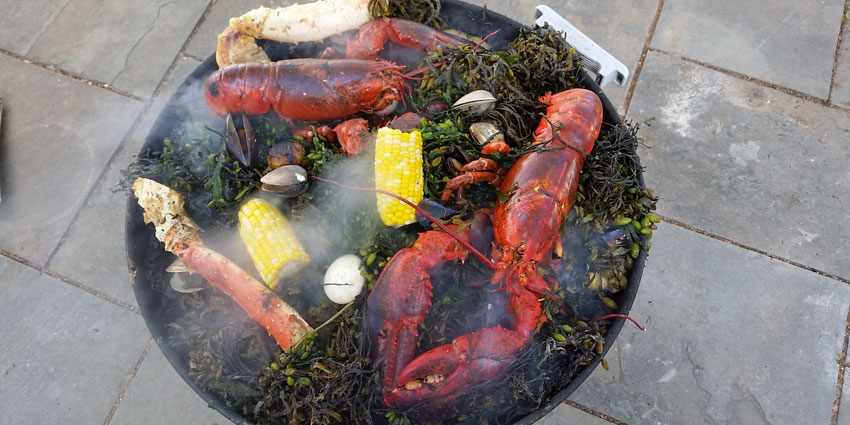
Step 7: Layer your food. Put your corn, potatoes, and sausage onto the seaweed. Onto that, add the mussels, clams, crab legs, and lobsters. Toss the garlic, onion, herbs, and a few lemon wedges onto the pile and sprinkle with some salt, pepper, and Old Bay seasoning.
Step 8: Cover your food with another mound of seaweed. Cover all the food thoroughly to ensure a good even steaming. Once covered with seaweed, place your eggs on top of the seaweed. These are quite literally, your egg timers. When all of the eggs are hard boiled, your food will be ready to eat. Put the lid on the BBQ and open the vents a crack to let some steam to escape.
Step 9: Check your time. After 45 minutes check one egg. If it’s fully cooked you can start to peel off the seaweed to check on your lobsters, clams, and mussels. If your mussels and clams are open and your lobsters are bright red, your food is done.
Step 10: Plate it up. Use long tongs, peel away the top layer of seaweed, and put it aside. Use your tongs to put all of your food on plates
Step 11: Butter, crack, and chow. Melt some butter, crack some claws, and dig in to your authentic-tasting (and smelling) New England Clam bake.